4 Ways to make Couchbase do the hard work: Part IV
In part 3 of this series we looked at compound keys in more detail and also into persisting view data. Today we are going to look at what to do when Couchbase's query model can't fulfill what you need! (Or you need an excuse to play with more cool tech).
Enter ElasticSearch!

Elasticsearch is a search server based on Lucene, it's great for real time analytics, flexible queries and features such as full text search, fuzzy matching and geo location queries.
It's the perfect tool to provide a richer querying model for Couchbase and luckily for us it's really easy to integrate into our stack! Couchbase themselves maintain a 'transport plugin' which is a way to replicate Couchbase buckets to an ElasticSearch cluster. You can find the plugin here on github.
This post is going to be broken down into 3 sections:
- Overview of our data and why we need to or would want to use ElasticSearch
- How to install and setup both ElasticSearch and the transport plugin.
- Sample query in Ruby
Current state of play
So if you've been following the series of articles you'll know we've started off with a basic document and gradually added more information as we've gone along. If you want to follow along with this post then you'll need to run the following ruby script. (Make sure your bucket name is 'users').
This script will insert 1000 documents into our local Couchbase instance, they'll have the following data structure (all attribute values are generated randomly).
In our previous articles we've queried similar data like this using the Couchbase map reduce views, we've done time based searches, origin based filtering and compound keys for when we've wanted to do a mixture of the above. What would we do though if we wanted to identify all the users that had between 10 to 200 visits but excluded the 61 to 120 range within that grouping, plus we want to only filter origins of either 'GB' or 'ES'? This starts to get very difficult, time consuming and ultimately leads to Couchbase views that are either inflexible or hard to work with. This doesn't even cover additional queries such as incorporating geo location, matching on more attributes or free text search.
As mentioned at the start ElasticSearch is great for this type of querying and the perfect companion to Couchbase. Let's see how to get it installed!
Installing ElasticSearch
(Disclaimer: Both Couchbase and ElasticSearch are evolving quickly, so there are incompatabilies between certain versions, follow the versions here to avoid errors.) Make sure that you have Couchbase 2.2.0 installed and with a bucket named 'users' provisioned
So let's navigate to our /opt directory.
cd /opt/
Download ElasticSearch version 0.90.5
sudo wget http://download.elasticsearch.org/elasticsearch/elasticsearch/elasticsearch-0.90.5.tar.gz
Unzip the package in our current directory
sudo tar zxvf elasticsearch-0.90.5.tar.gz
Make our main linux user the owner of the folder and sub files/folders
sudo chown -R YOUR_LINUX_USER:YOUR_LINUX_USER elasticsearch-0.90.5/
Navigate into the elasticSearch folder
cd elasticsearch-0.90.5/
Install elasticSearch head plugin, think of it as an admin console
bin/plugin -install mobz/elasticsearch-head
Install the Couchbase transport plugin to allow us to perform replication
bin/plugin -install transport-couchbase -url http://packages.couchbase.com.s3.amazonaws.com/releases/elastic-search-adapter/1.2.0/elasticsearch-transport-couchbase-1.2.0.zip
Add our Couchbase password to the config file
echo "couchbase.password: password" >> config/elasticsearch.yml
Set up some default ElasticSearch mapping settings
curl -XPUT http://localhost:9200/_template/couchbase -d @plugins/transport-couchbase/couchbase_template.json
Setting up replication
Let's start up ElasticSearch by executing the following command in it's parent folder. The -f flag causes the process to run in the foreground allowing us to see the logs on the terminal
bin/elasticsearch -f
You should see in the startup text on the terminal 'loaded [transport-couchbase]'. If you have then great, if not go back and make sure you followed all the steps in the ES installation.
Navigate to http://127.0.0.1:9200/_plugin/head/ to view the admin console for ElasticSearch. Select new index and name it 'users', also pick 5 shards and 0 replicas (as we are only running a single ES instance).
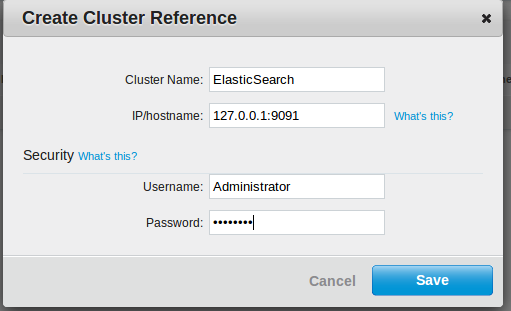
Now we need to configure Couchbase to replicate our bucket, navigate to the XDCR tab and click create cluster reference. (Enter the ip of your es cluster (127.0.0.1:901 and your couchbase password here)

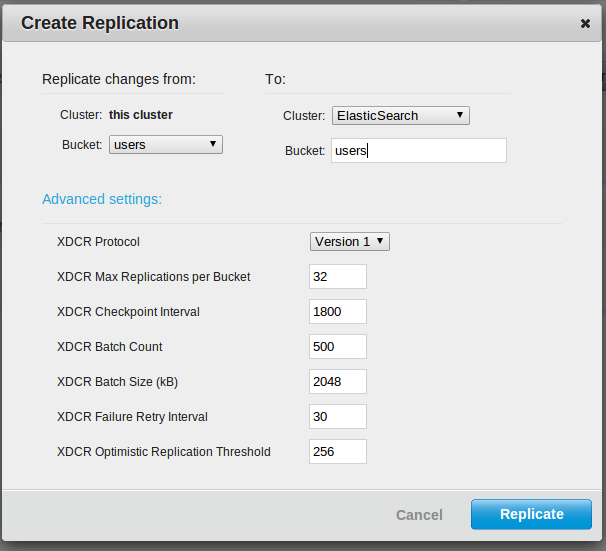
Then click on create replication and do the following:

Make sure you have clicked advanced settings and set the protocol to version 1 otherwise it won't work. (It's caught us out before!).
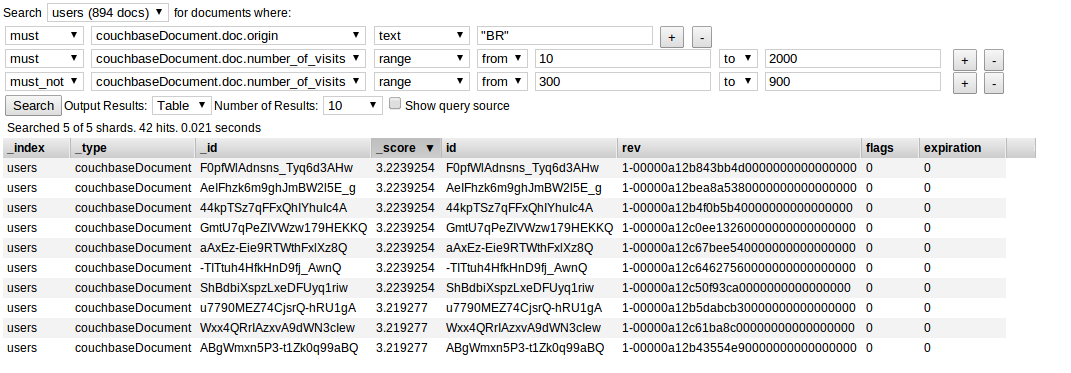
If you go back the ES admin console and refresh you should start to see the number of docs go up until all 1000 documents are available. Play around with the structured query viewer in the console to get a feel for some of the things ES offers.

A real life query with ElasticSearch and Couchbase
Now we have our documents replicating to Couchbase upon changes,new documents or deletions, pretty cool!
Be aware that as the setup script generates random data will have different values to this example!
So our new 'feature' has come down from our bosses, they want the ability for us to delete very specific users and based upon a multitude of parameters. In our 'feature' let's pretend that we have to delete all users that have number of visits between 10 to 2000 visits and with an origin of 'ES' BUT we can't delete any users that have the origin 'ES' and between 61 to 120 views.
The following script executes the ElasticSearch query for us (the params are hard coded but could easily be extracted into a method). It runs our query and then we parse the results to obtain the Couchbase ids, we then can use the Couchbase SDK to call delete on each of them.
The coolest thing is to go look in your Couchbase admin console, you'll see we only have X documents after running this script, now go look at the ES console, the deletes have already been replicated across and the data is in sync, cool!
Conclusion
We've barely scratched the surface of ElasticSearch's powerful querying interface. Check out the queries and filters of the official documentation and try some of them out!
What we have covered is how to set up automatic replication and a powerful way to extend Couchbase's abilities. You can approach this integration in a number of ways, perhaps you need more in depth filtering and then can feed aggregated data or new documents back into Couchbase or you could use ES as your main analytics engine and have no interaction back to Couchbase and have it as a master/slave relationship only.
Either way we thoroughly recommend that you try out ElasticSearch for yourselves!
As always you can reach out to us on twitter here and feel free to leave comments,corrections and suggestions in the comments below.
Big thanks to @mschoch for his work on the transport plugin and this article
